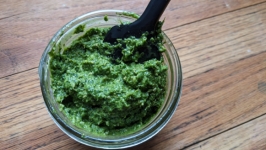


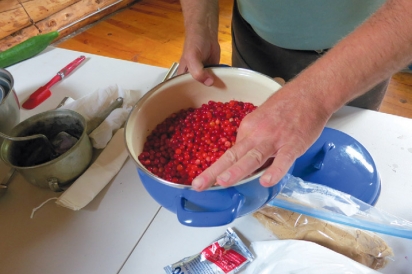
Cranberry Caviar with Sourdough Blini
The idea for this recipe came when I was simmering some cranberries for sauce. I peeked in the pot and thought that they looked not all that different from big salmon roe.

Alaska’s wild berry season comes and goes quickly, leaving many homes with a burst of fresh berries. Luckily, with some easy preservation techniques, you can extend the fall berry harvest for months to come. If you’re new to food preservation, try freezing and dehydrating this season. Each requires some common and specialized equipment, and a little time. The effort is well worth it when you’re enjoying berries in the middle of winter. Beyond freezing and drying, canning berries in jars is also a great way to create shelf-stable food that can be enjoyed for months. We’ll give a beginner’s overview of canning, and we recommend working with tested, published recipes for putting up berries in jars.
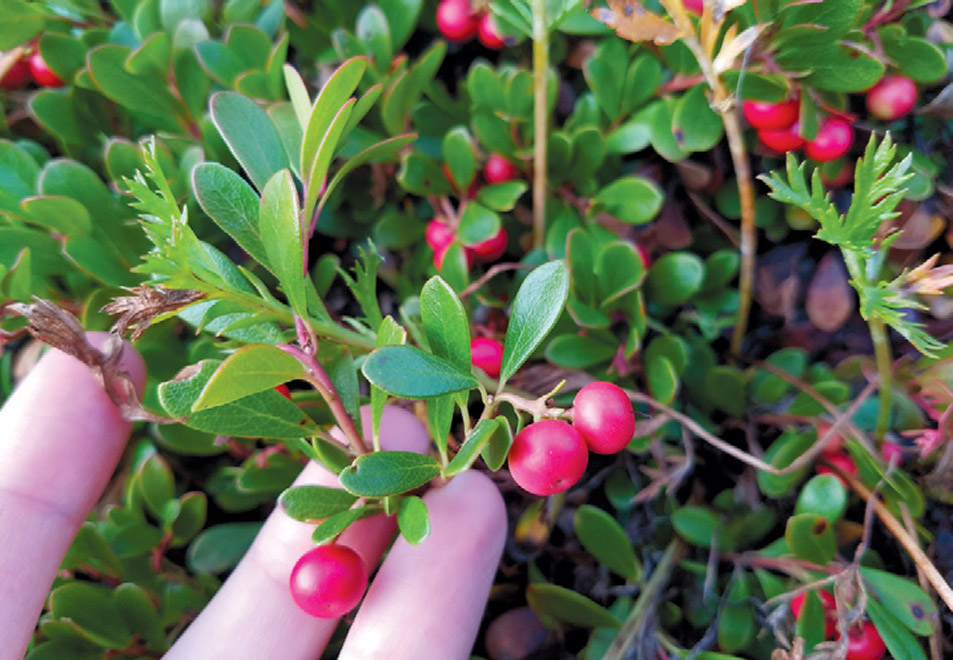
A word of safety: While berry picking can be a wonderful solo or family adventure, if you’re new to foraging in Alaska, make sure to use a guidebook with photographs, or forage with a knowledgeable friend, to avoid poisonous plants. We are big fans of Janice Schofield’s Discovering Wild Plants, which is easy to find in bookstores throughout Alaska.
Equipment: Cookie sheets, parchment paper, freezer-safe reusable storage containers
Perhaps the fastest way to preserve fresh berries is by freezing them solid and keeping them in a freezer until you’re ready to use them. Freezing is also a great option for food preservation beginners because you don’t need to buy any additional equipment to get the job done. As long as you have a freezer, you’re set.
Start by washing the berries and separating out any rogue stems and leaves from the mix. Lay out a loose, single layer of washed, towel-dried berries on a parchment-lined cookie sheet. Freeze the berries on the cookie sheet for a few hours. Once the berries are frozen solid, transfer them to a reusable freezer container. You can freeze a tray at a time, and add the frozen berries to the same container. This technique of allowing the berries to fully freeze without touching anything else maintains their ability to stay loose and free in their final freezer storage container, rather than stuck in frozen clumps that are difficult to pry apart if you just want to remove a small amount of berries.
If you picked your berries knowing they would all be destined for delicious wintertime jam or pie baking projects and you plan on thawing all of the berries at once, the cookie sheet freezer method probably isn’t necessary. Once your fruit is clean, free from debris, and fairly dry, freezing can be as simple as freezing them directly in containers and skipping the cookie sheet step.
Equipment: Dehydrator or an oven and cookie sheets
Dehydrating food significantly extends its non-refrigerated shelf life. You can dehydrate berries either by using a standard dehydrator or an oven. Dried fruit is a classic trail mix ingredient, cereal mix-in, or anytime healthy snack.
If you’re using a food dehydrator, follow the time and temperature settings in the manual for the berries you’re drying, and check on them so you can stop the process before they get too crispy. Make sure berries are rinsed, free of debris, and kept in a single layer to dry evenly.
If you’re using the oven, place berries in a single layer on a cookie sheet (parchment is a great tool here as well if you have it), then turn your oven on to the lowest setting (likely between 140 and 200°F). Keep the oven door ajar to allow moisture to escape. Check the berries every 20 minutes or so and pull them out when they reach a texture you like. Really juicy berries can benefit from refrigerator storage even after they’re dried, but they will keep much longer than fresh berries.
Many communities around Alaska have shared tool libraries where you might be able to borrow a dehydrator. In Anchorage, the Anchorage Community House has a kitchen equipment loan program that includes a dehydrator.
Equipment: Large pot, colander, wire mesh sieve (or cheesecloth), potato masher. Ingredients: Sugar or honey (optional)
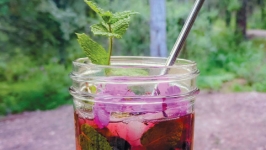
Ever tried a high bush cranberry vodka? Preserving berry juice in the fall can make for wonderful cocktail or non-alcoholic beverages in the winter—right when you’re pining for the daylight and wishing for Alaska’s green, lush outdoors to return.
Creating juice from berries (then freezing or canning the juice) can be a fun way to preserve the flavors of harvest season. Aside from drinking it as a beverage, homemade berry juice can also be used to make jellies, syrups, salad dressings, berry reductions or glazes, and so much more.
Juices are fairly straightforward to make—the biggest resources they require are time and patience.
For a juice that will be frozen or refrigerated and consumed within a few days, boil a 1:1 ratio of washed berries and water. Boil for 10–15 minutes, then remove from the heat and use a potato masher (or any other hard-bottomed kitchen utensil) to break open the berry skins. You’ll have to work harder for thick-skinned berries. Return the mixture to a boil and boil for 5–10 minutes. Remove it from the heat until it’s cool enough to handle with your bare hands. Run the cooled berry mash mixture through a colander first, then through a wire mesh sieve or cheesecloth, depending on how much pulp you want to remove. Add sugar or honey, to taste.
Freeze your juice in canning jars for long-term storage. Remember to leave a little headspace for the juice to expand while freezing. Use refrigerated juice within a week.
Canning—the preservation of food in glass jars using a water bath or a pressure cooker—is a science. Canning recipes aren’t recipes just for flavor; they’re based on variables like food thickness, acidity, sugar content, and other aspects that directly affect food chemistry and bacteria survivability. Canning recipes aren’t estimates or recommendations—they give exact instructions, ingredients, temperatures, and time frames to ensure that food still will be safe for you to eat months later.
The UAF Cooperative Extension Office has many publications containing lab-tested and verified safe berry canning recipes, for juice, jellies, pie filling, and more, offered free to the public in their offices and online.
“Some berries will require a certain amount of acid to be safe for water-bath canning, and some will require additional pectin or sugar,” says Gina Dionne, Program Assistant at the UAF Cooperative Extension’s Anchorage Outreach Center. Dionne reminds Alaskans that while canning is an effective, delicious way to preserve our state’s bounty of wild berries, it’s important to use tested recipes from a trusted source.


Copyright ©2025 Edible Alaska. All rights reserved